Notebooks and notes
Find, organize, and clean up the notes you take while reading.
Updated October 1, 2026
When you highlight a passage in a sermon or book and add a note, the app saves it in a notebook on your dashboard, so you can find it again later.
Step-by-step guide
- 01
Step 01 / 04
Your notebooks
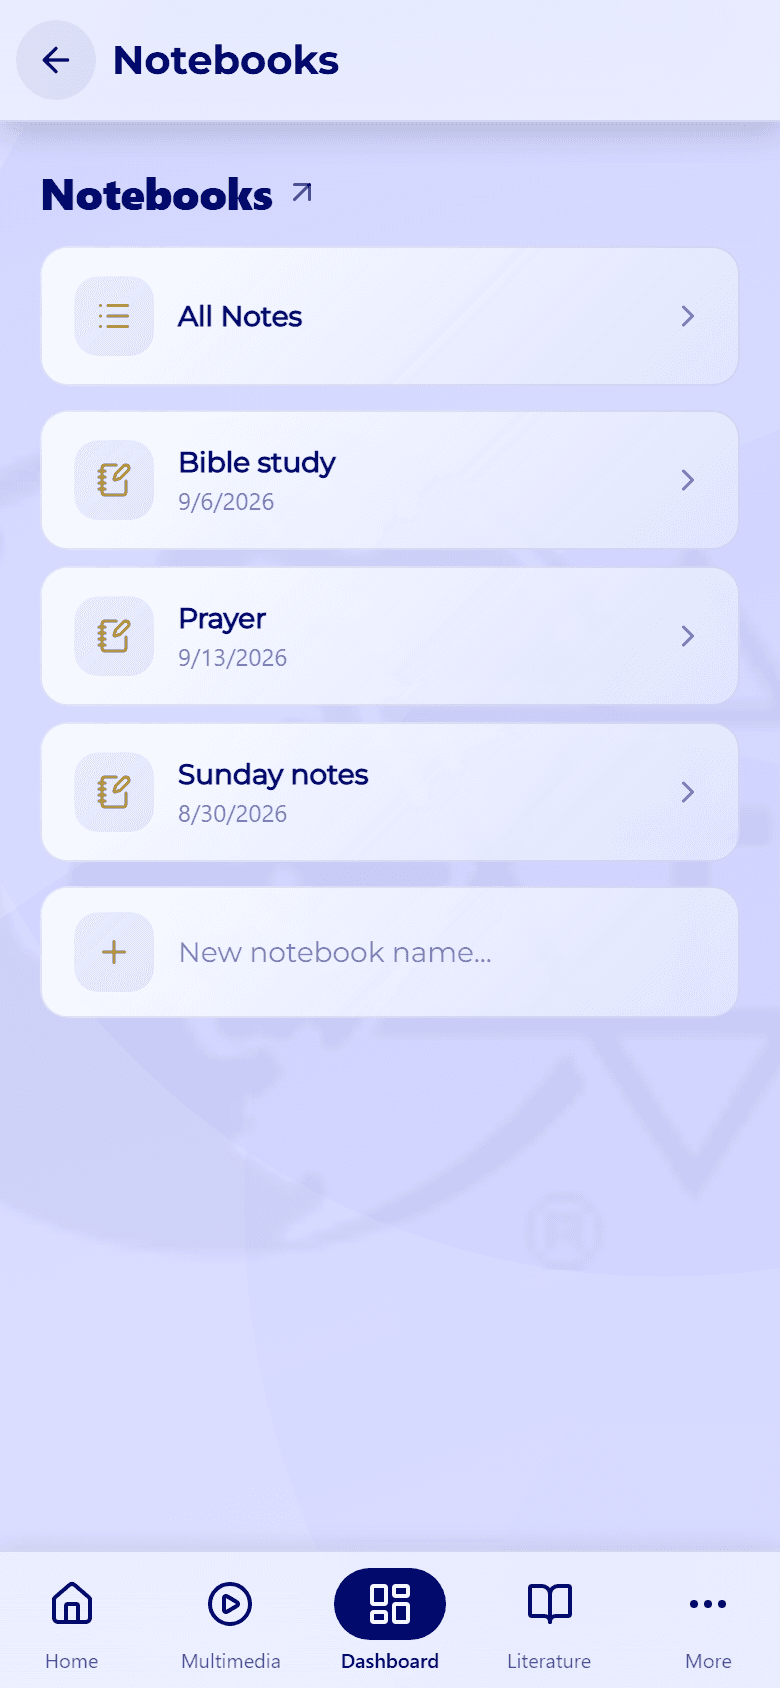
In My Dashboard, tap the arrow next to Notebooks to see them all. All Notes at the top holds every note you've written.
- Create a notebook: type a name in New notebook name... at the bottom, then tap +.
- Delete a notebook: press and hold it, then confirm with Delete. The notes inside aren't deleted; you'll still find them in All Notes.
- 02
Step 02 / 04
Open a notebook
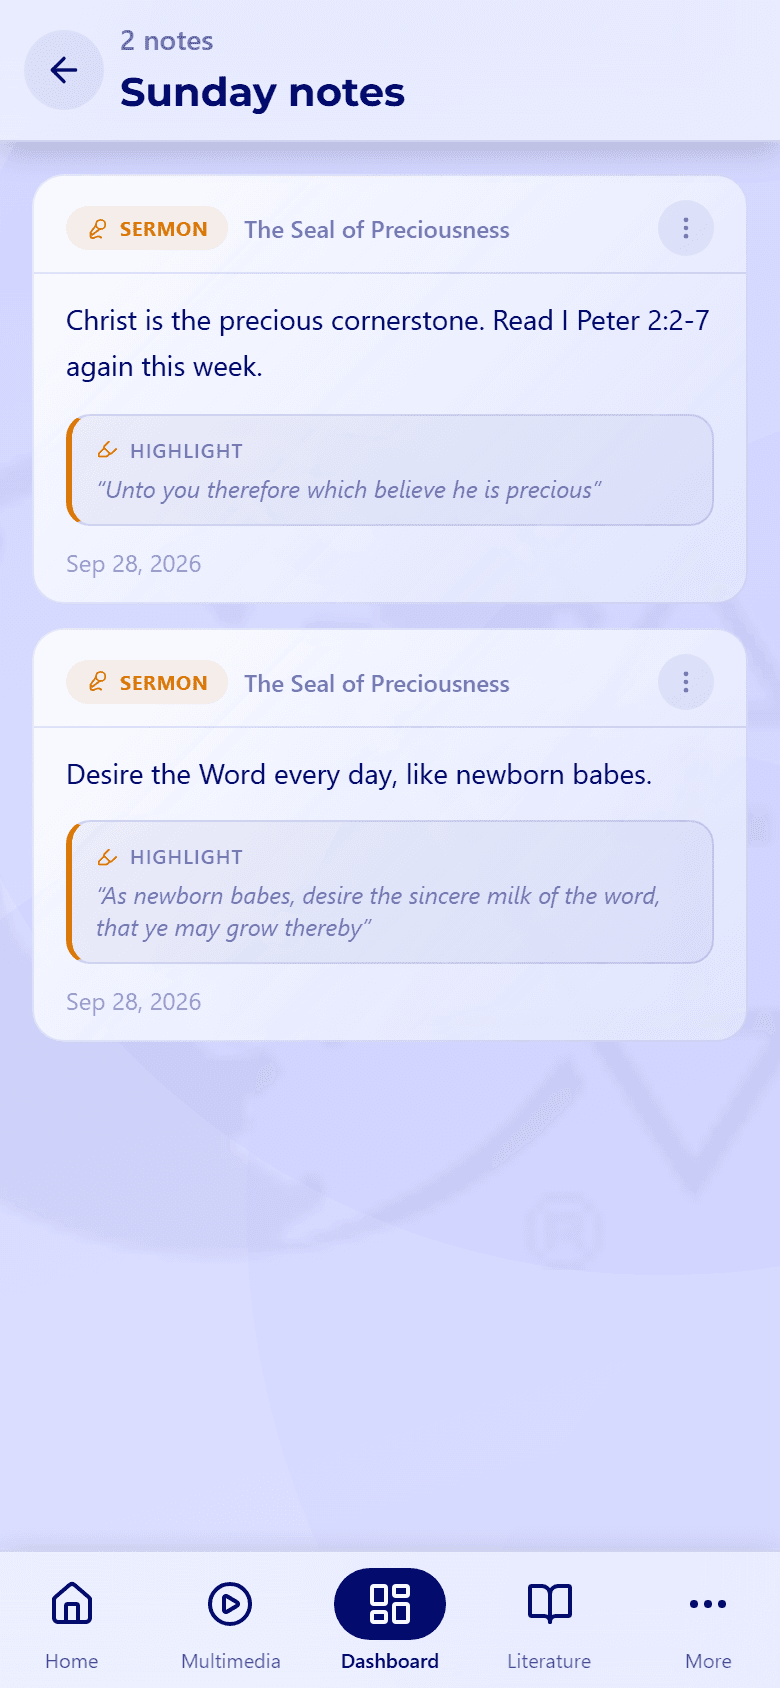
Tap a notebook to see its notes. Each one shows whether it came from a sermon or a book, what you wrote, and the passage you highlighted, with its date.
- 03
Step 03 / 04
Move or delete a note
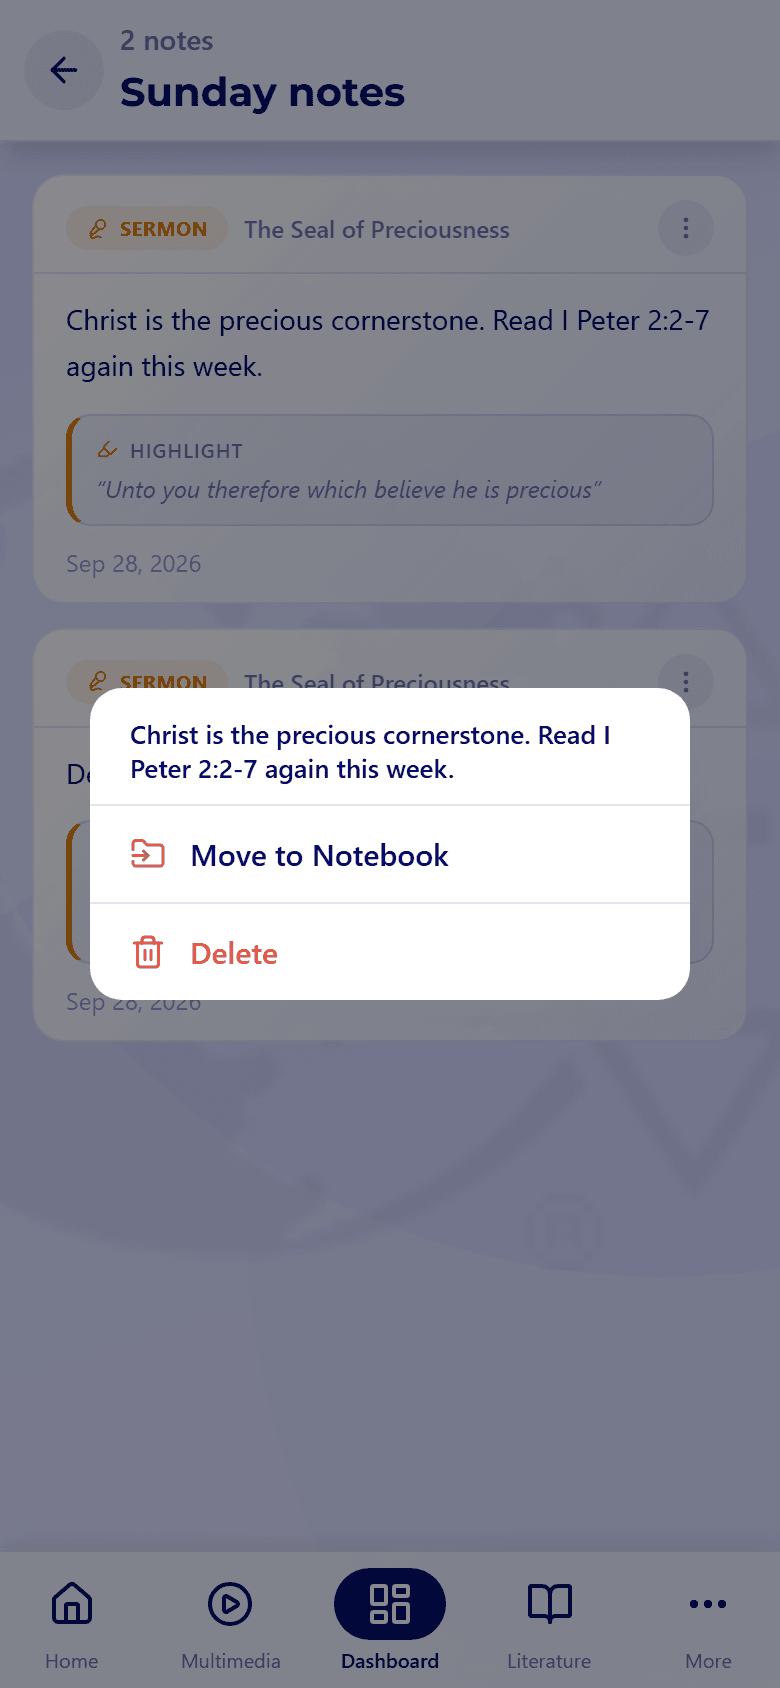
Tap the ⋮ button on a note to open its options:
- Move to Notebook files it in a different notebook.
- Delete removes the note right away.
- 04
Step 04 / 04
Every note in one place
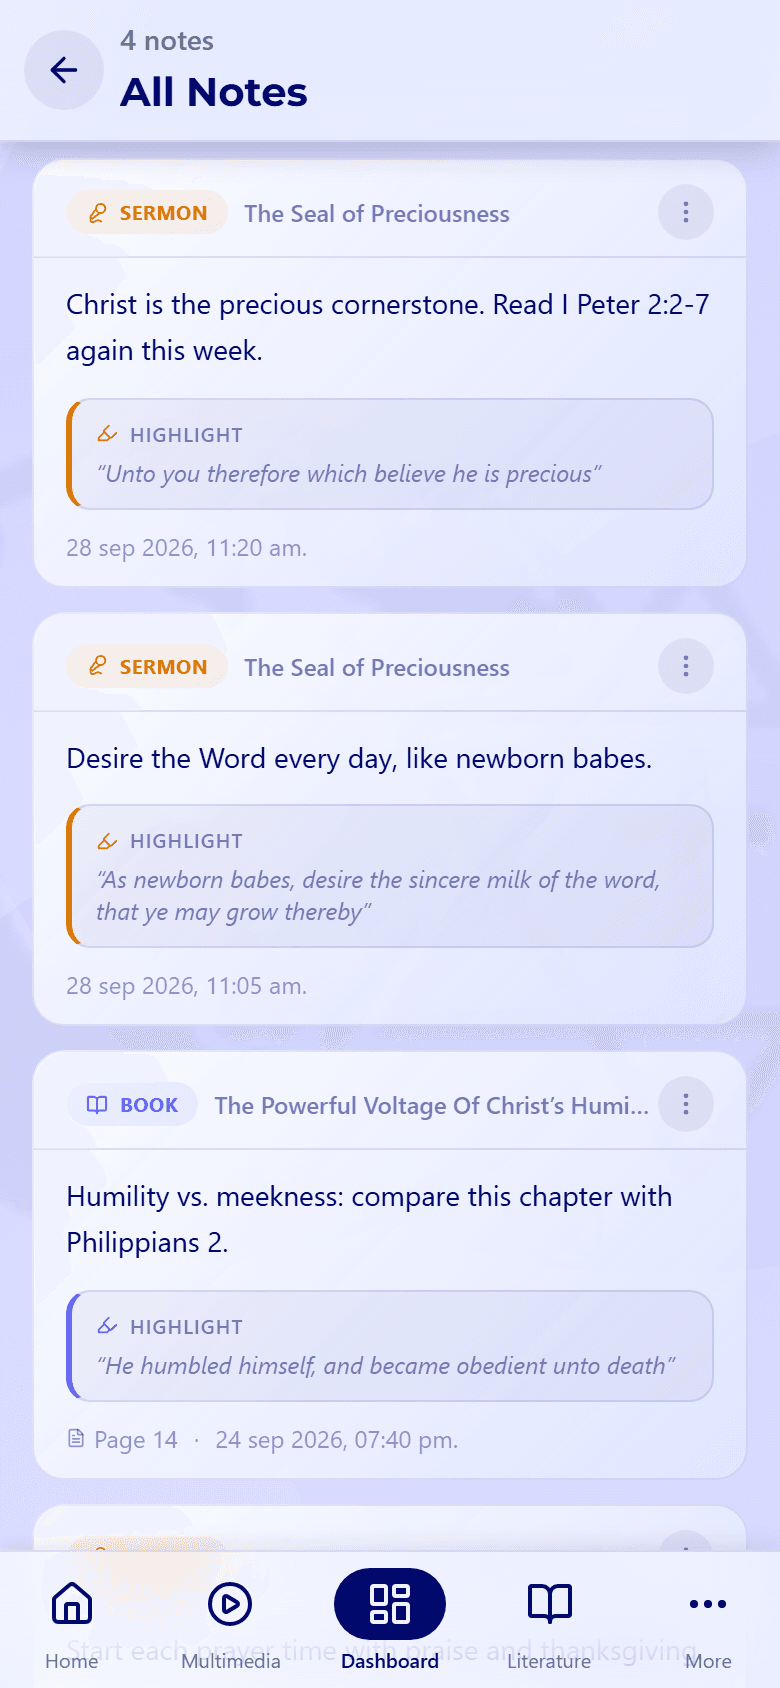
All Notes lists the notes from all your notebooks together, with the total at the top. Book notes also show the page they came from.
Notes start while you read: see Read books for how to highlight a passage and add a note.